Change The Normal Template Default Font To Times New Roman
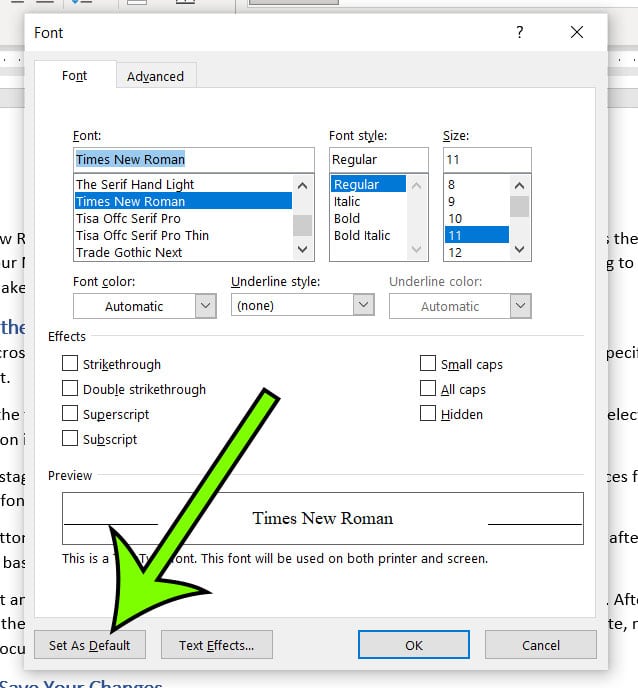
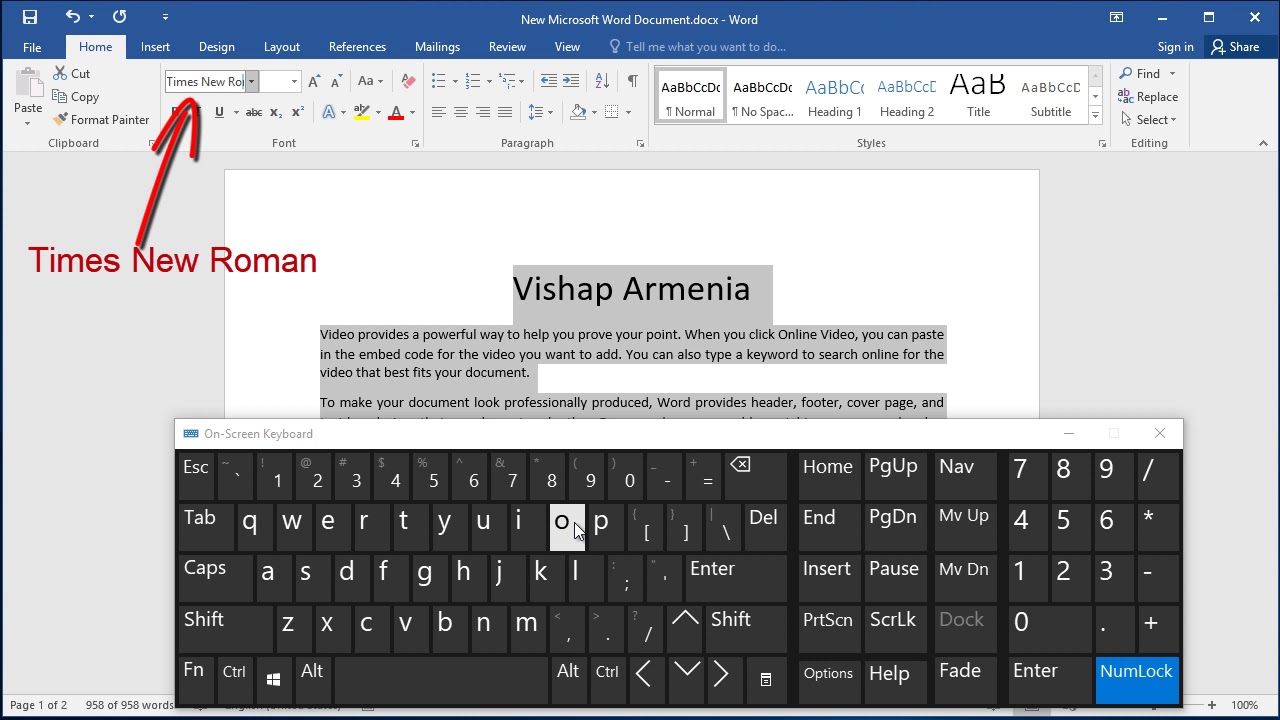
Change The Normal Template Default Font To Times New Roman - Create a new, blank document, for example by pressing ctrl+n. In the styles pane (ctrl+alt+shift+s), click the manage styles button. This means that any new document. You can set times new roman as your default font, and i'm going to walk you through exactly how to do it. To make times new roman your default font on word 2010, simply open a new document, select the “home” tab, click on the font settings, choose “times new roman,” set. The font dialog box in word with times new roman, regular, and 12 selected, and the preview of these settings highlighted at the bottom. In word, you can change the default font via the font dialog box (ctrl+d). Make any changes that you want, and then click default. Most of the styles in. If you want to return to 2003 default font, paragraph and style settings and macros you can do that easily: Click on the “home” tab and navigate to the “font” group. After initial installation, microsoft word typically uses times new roman serif font as its default. Click on the font dropdown menu and select “times new roman”. If you want to change the default font in word, here’s what you’ll need to do. For example, to reset the normal style's font to times new roman, follow these steps: In word, you can change the default font via the font dialog box (ctrl+d). This means that any new document. Click the dropdown menu to. Follow the same basic procedure to adjust the fonts. Following these simple steps will make. Follow the same basic procedure to adjust the fonts. In order to change the default font, you need to open your word document and access the font. Scroll down to the “general” section and locate the “default font” option. This means that any new document. In the styles pane (ctrl+alt+shift+s), click the manage styles button. This means that any new document. For example, to reset the normal style's font to times new roman, follow these steps: In the home ribbon, click the arrow in the bottom right corner of the font. We show you a simple way to change the default font and default font siize in microsoft word by setting a different font for. After choosing your font and size, you’ll notice a button labeled “set as default” at the bottom of the dialog box. Most of the styles in. In the styles pane (ctrl+alt+shift+s), click the manage styles button. Open a new blank document. Later, if/when you are prompted to save. Create a new, blank document, for example by pressing ctrl+n. We'll cover everything from the basic steps to set it up to troubleshooting any. In the styles pane (ctrl+alt+shift+s), click the manage styles button. Make any changes that you want, and then click default. If that’s happening, here are some things to try. Click [set as default] > select all documents based on the normal template? >. Most of the styles in. This means that any new document. Scroll down to the “general” section and locate the “default font” option. After initial installation, microsoft word typically uses times new roman serif font as its default. In word, you can change the default font via the font dialog box (ctrl+d). We show you a simple way to change the default font and default font siize in microsoft word by setting a different font for the normal.dotm template. For example, to reset the normal style's font to times new roman, follow these steps: This means that any. Choose the font you want and click the set as default button. To make times new roman your default font on word 2010, simply open a new document, select the “home” tab, click on the font settings, choose “times new roman,” set. Follow the same basic procedure to adjust the fonts. Make any changes that you want, and then click. This means that any new document. After initial installation, microsoft word typically uses times new roman serif font as its default. Open a new blank document. Click [set as default] > select all documents based on the normal template? >. For example, to reset the normal style's font to times new roman, follow these steps: In the home ribbon, click the arrow in the bottom right corner of the font. To make times new roman your default font on word 2010, simply open a new document, select the “home” tab, click on the font settings, choose “times new roman,” set. This tutorial will show you how to change the default font for any new document. On the set defaults tab, specify the desired. Open a new blank document. Follow the same basic procedure to adjust the fonts. Choose the font you want and click the set as default button. We show you a simple way to change the default font and default font siize in microsoft word by setting a different font for the normal.dotm. When you're happy with the. Open a new blank document. Later, if/when you are prompted to save. Click [set as default] > select all documents based on the normal template? >. Scroll down to the “general” section and locate the “default font” option. For example, to reset the normal style's font to times new roman, follow these steps: To make times new roman your default font on word 2010, simply open a new document, select the “home” tab, click on the font settings, choose “times new roman,” set. Open microsoft word and create a new document. After initial installation, microsoft word typically uses times new roman serif font as its default. Setting times new roman as the default font in word can streamline your workflow and ensure consistency across all your documents. We'll cover everything from the basic steps to set it up to troubleshooting any. If you want to return to 2003 default font, paragraph and style settings and macros you can do that easily: Click on the “home” tab and navigate to the “font” group. This tutorial will show you how to change the default font for any new document you create in microsoft word. Click on the font dropdown menu and select “times new roman”. In word, you can change the default font via the font dialog box (ctrl+d).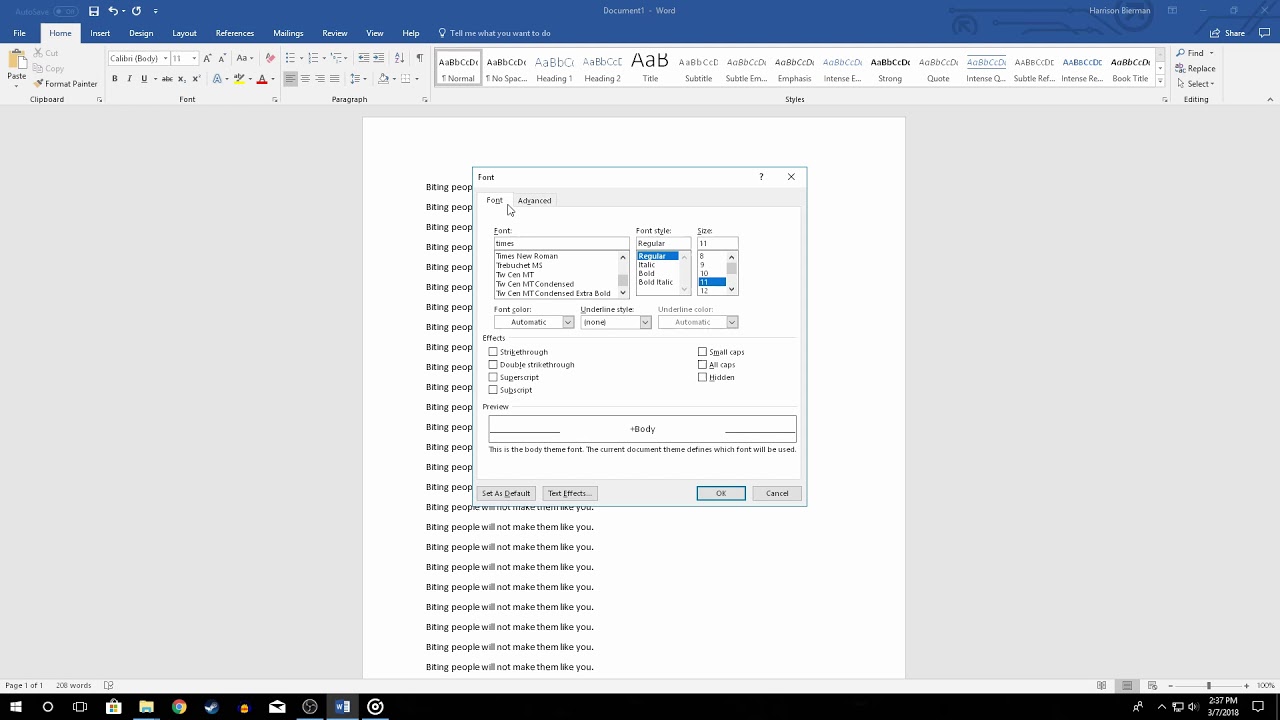
Set Times New Roman 12pt. font to Default on (Word 2016) YouTube
How to Make Times New Roman Default on Word Support Your Tech
Changing the Default Font in Microsoft Word
How to Change Font to Times New Roman, 12 point in Word 2016 YouTube

Mengatur Font Times New Roman secara Default di Microsoft Word YouTube

Incredible How To Change Normal Style Font To Times New Roman Free
Change The Normal Template Default Font

How to change the default font in Microsoft Word from Calibri 11 to
How to Change Font to Times New Roman, 12 point in Word YouTube
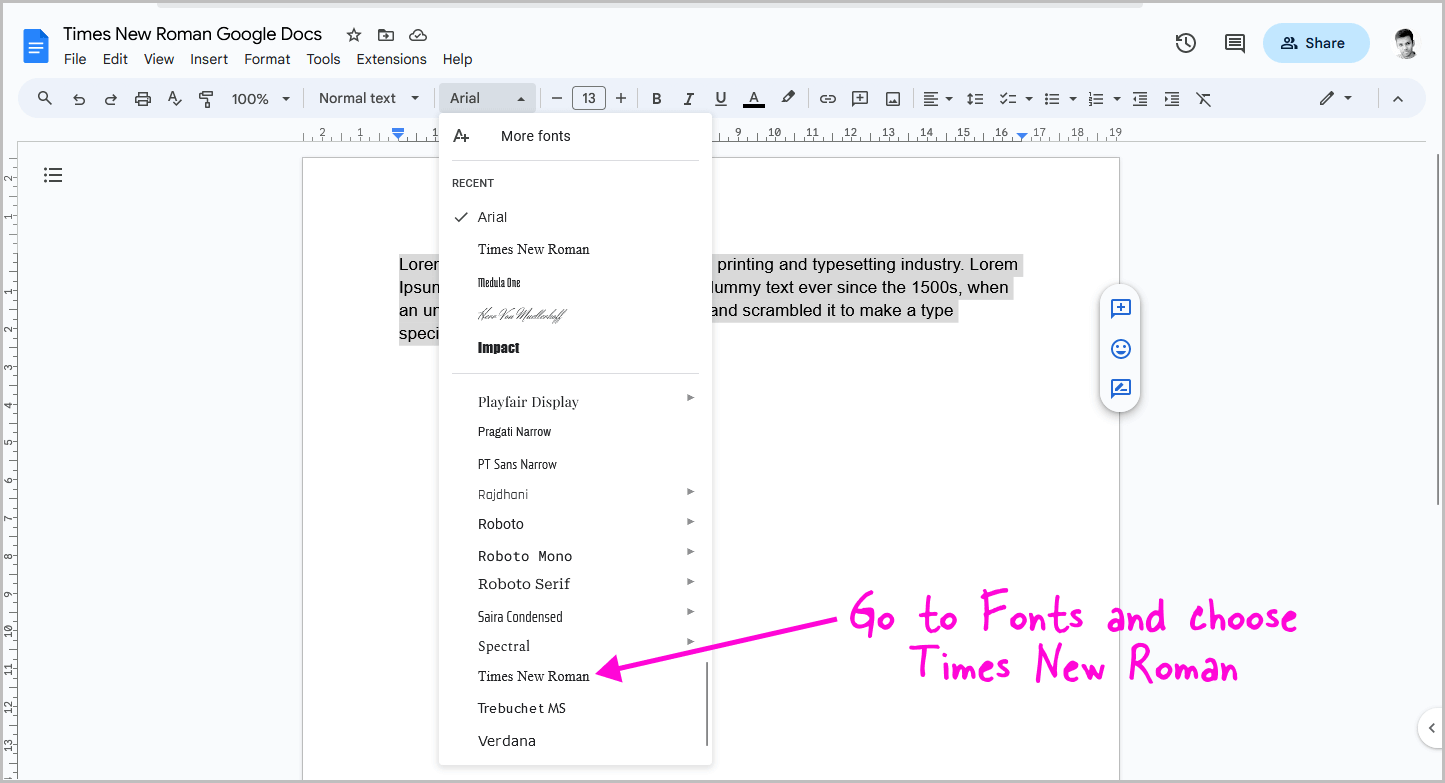
How to Make Times New Roman Default on Google Docs
We Show You A Simple Way To Change The Default Font And Default Font Siize In Microsoft Word By Setting A Different Font For The Normal.dotm Template.
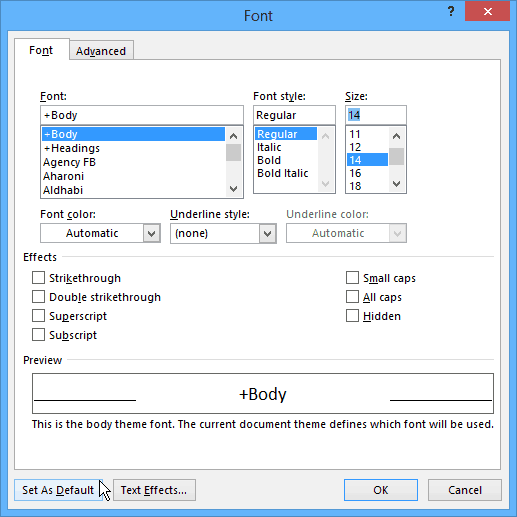
Choose The Font Style And Size You Would Like Word To Use By Default (E.g., Times New Roman, Size:
The Font Dialog Box In Word With Times New Roman, Regular, And 12 Selected, And The Preview Of These Settings Highlighted At The Bottom.
Create A New, Blank Document, For Example By Pressing Ctrl+N.
Related Post: