Change The Normal Template Default Font
Change The Normal Template Default Font - Go to format > font > font. For example, the default font for new blank documents is based on the normal template. You can create different templates to. Switch or remove a theme. Make any changes that you want to the fonts, margins, spacing, and other settings. Select default, and then select yes. The default font applies to new documents that are based on the active template, usually normal.dotm. Select default, and then select yes. You can also press and hold + d to open the font dialog box. Highlight the text where you want to change the font. For more info, see adjust indents and spacing. Go to format > font > font. Switch or remove a theme. Select default, and then select yes. To use your favorite font in word all the time, set it as the default. The default font applies to new documents that are based on the active template, usually normal.dotm. Select the arrow next to font color, and then choose a color. You can also press and hold + d to open the font dialog box. Make any changes that you want to the fonts, margins, spacing, and other settings. Select default and then select yes to apply the change to all new documents based on the template. Select default, and then select yes. For more info, see adjust indents and spacing. Select the font and size you want to use. Choose a standard color theme. Add some color by selecting the font color button and choosing a color. Go to format > font > font. For more info, see adjust indents and spacing. Make any changes that you want to the fonts, margins, spacing, and other settings. Choose all documents based on the normal template. You can also press and hold + d to open the font dialog box. To use your favorite font in word all the time, set it as the default. The default font applies to new documents that are based on the active template, usually normal.dotm. Go to format > font > font. Open the normal template (normal.dotm). Change the default font or text color for email messages every document in office 2010 that you. Select default, and then select yes. Select default, and then select yes. Open the normal template (normal.dotm). Add some color by selecting the font color button and choosing a color. Select the arrow next to font color, and then choose a color. Choose a standard color theme. Select the font and size you want to use. For more info, see adjust indents and spacing. The default font is calibri (body) 11, but you can change this. The default theme is office theme, with a white background and dark, subtle colors. Highlight the text where you want to change the font. For example, the default font for new blank documents is based on the normal template. Make any changes that you want to the fonts, margins, spacing, and other settings. When you set a default font, every new document you open will use the font settings you selected and set as. For information on changing font sizes, see change the font size in outlook for mac. Save a custom theme for reuse. Select the font and size you want to use. To change the spacing before or after the selected paragraphs, select the arrow next to before or after and enter the amount of space that you want. Changing the default. For example, the default font for new blank documents is based on the normal template. The default theme is office theme, with a white background and dark, subtle colors. You can also press and hold + d to open the font dialog box. Highlight the text where you want to change the font. You can also press and hold +. Add some color by selecting the font color button and choosing a color. For more info, see adjust indents and spacing. You can also press and hold + d to open the font dialog box. Changing the default font in any template means that the font is used in every new document that is based on that template. Select the. On the page layout tab in excel or the design tab in word, click colors, and pick the color set you want. Select default and then select yes to apply the change to all new documents based on the template. Go to format > font > font. Make my changes the new default theme. Select the arrow next to font. You can also press and hold + d to open the font dialog box. Select the font and size you want to use. Save a custom theme for reuse. Changing the default font in any template means that the font is used in every new document that is based on that template. Switch or remove a theme. Make any changes that you want to the fonts, margins, spacing, and other settings. Choose all documents based on the normal template. The default font is calibri (body) 11, but you can change this. Open the template or a document based on the template whose default settings you want to change. Open the normal template (normal.dotm). For example, the default font for new blank documents is based on the normal template. For information on changing font sizes, see change the font size in outlook for mac. Select the font and size you want to use. Make my changes the new default theme. The default theme is office theme, with a white background and dark, subtle colors. You can also press and hold + d to open the font dialog box.
How To Change The Default Font In Microsoft Word For Mac regarding
Solved Task InstructionsChange the normal template default

Change Default Word Template
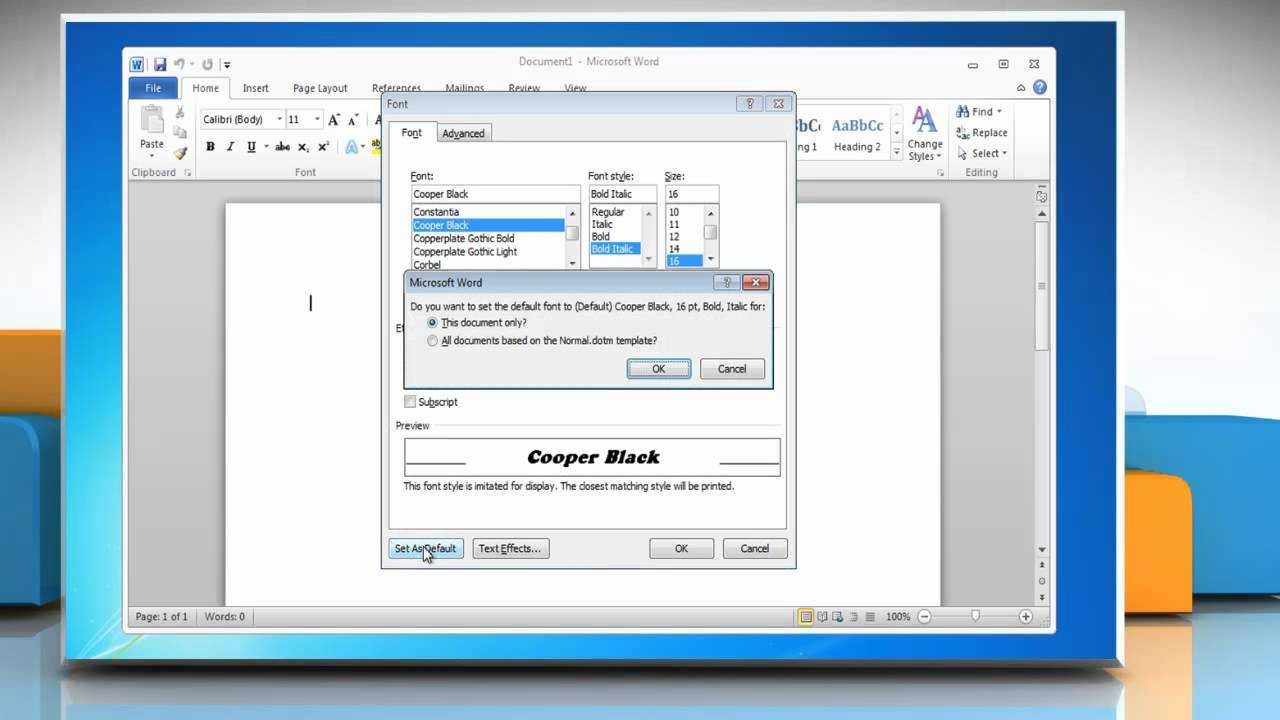
How To Set Default Font In Word 2010 Within Change The Normal Template
How to change default font on word abroc

Change The Normal Template Default Font Open An Existing Powerpoint

How to change default font in word 2016 actionkop
How To Change The Default Font And Font Size In Word 2010 And 2013 with
Change The Normal Template Default Font
Microsoft® Word 2010 How To Change The Default Font Intended For
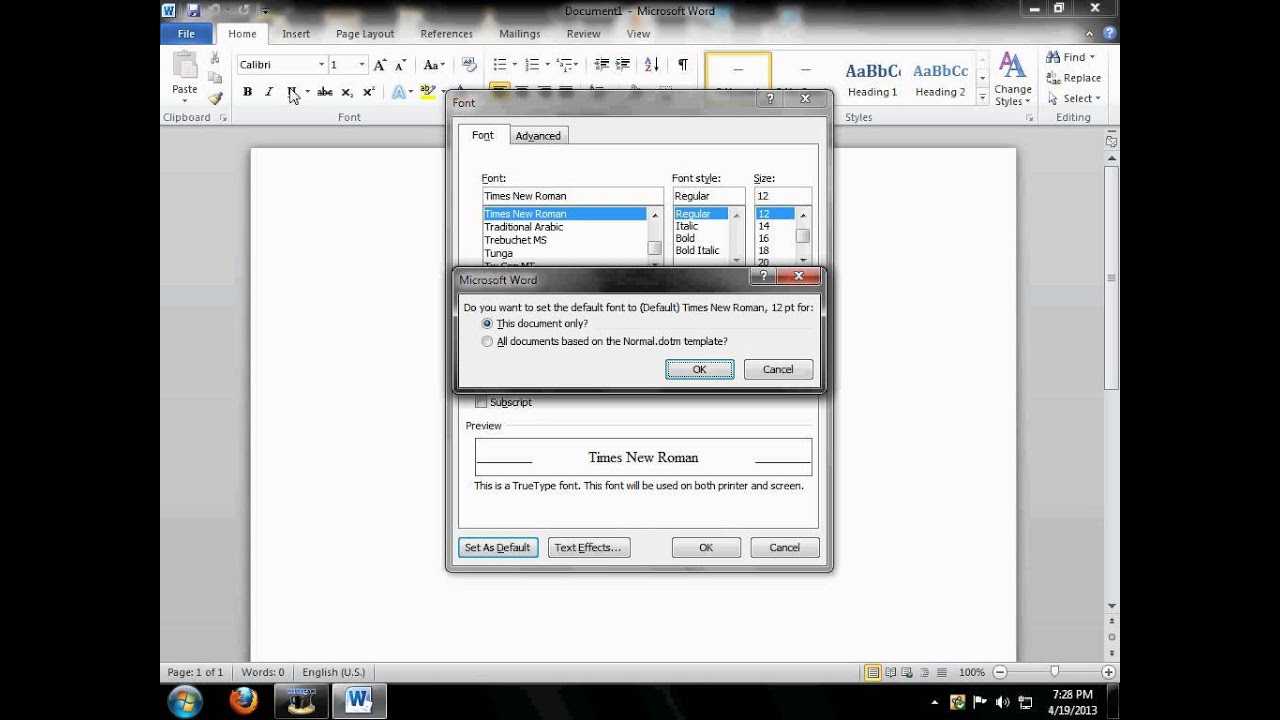
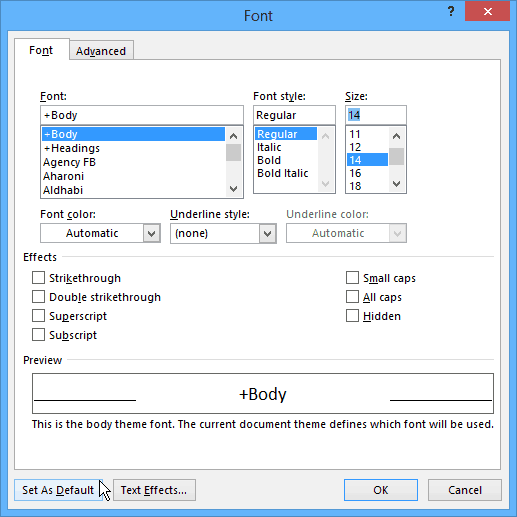
Select Default, And Then Select Yes.
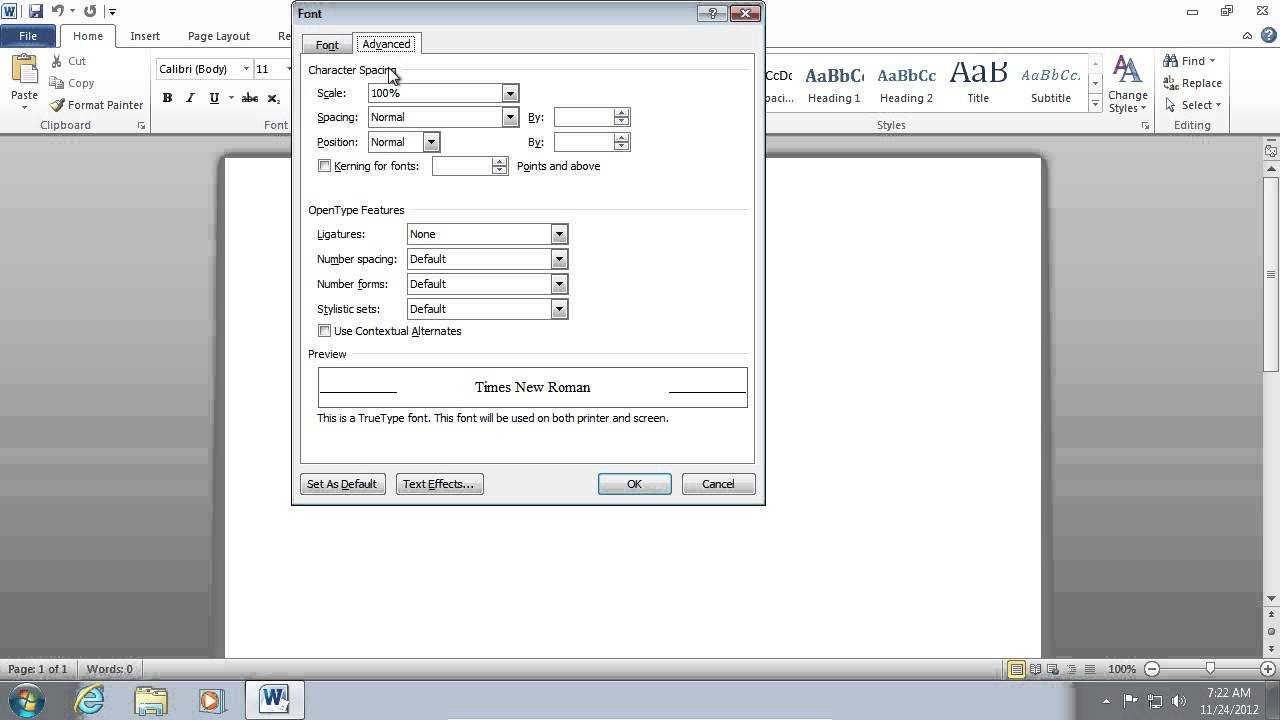
Go To Format > Font > Font.
To Use Your Favorite Font In Word All The Time, Set It As The Default.
For More Info, See Adjust Indents And Spacing.
Related Post: